
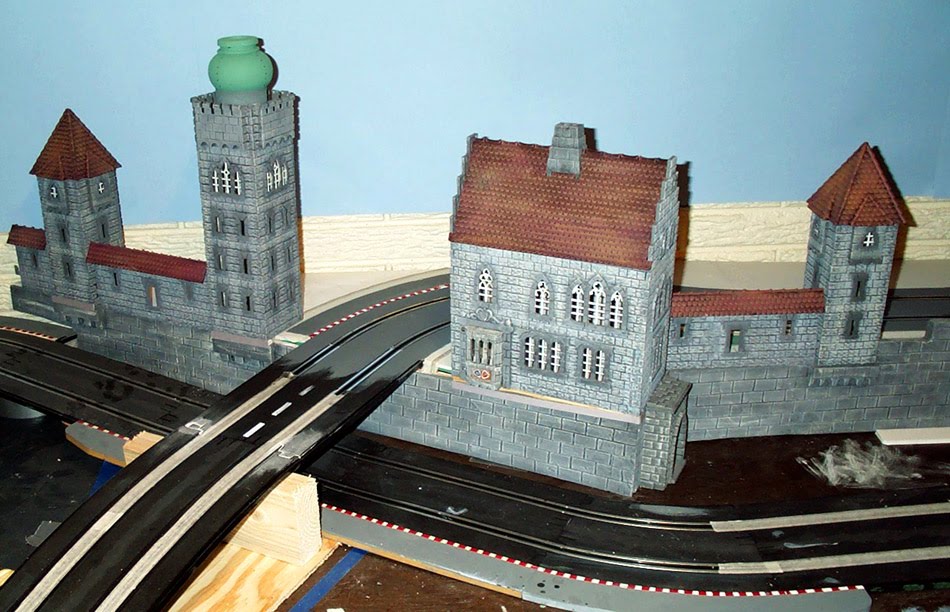
 THE MEDIEVAL CITY - AFTER PAINTING THE CASTLE STRUCTURE AND WALLS.
It took a lot of trial-and-error when it came to getting the paint job on the castle and city walls just right. A combination of dark washed and light dry-brushing seems to have provided the right effect, and I an pretty happy so far. The castle sections are really the centerpiece of this old town - everything else kinda follows; The tower will get a shiny finial on top of it's verdigris-copper dome, and it also needs a good wash to simulate some corrosion. The rest of the town buildings will be a little lighter and brighter, with some hanging flower baskets and window boxes (this IS Switzerland, after all. I'm also working out how to light the buildings here as well, and am getting ready to start the stone ramp/bridge that heads up into the town.
 THE MAIN STREET THROUGH THE CITY - TRACK FILLING AND PAINTING HAS BEGUN.
I've also altered the plan a little already. I needed to take a length out of the back straight in order to leave enough room for my track borders on each side of the room. Here is a revised diagram (below). The Curves are all R1s (17) and R2s (16) - I use them in different combinations to try and keep things interesting. On the diagram, the R1s have the dotted line - the R2s do not. (the diagram is from Ultimate Racer 3.0) I also use 22 full straights, 1 half straight and 3 double-length hump-back straights (normally used to build overpasses) for the rest. The diagram switches out a full for a half straight on the left side, just to keep the layout clearer.

THE REVISED TRACK PLAN (CLICK TO ENLARGE).
The curvy side at left gradually rises to just over a foot or so before heading back down through those esses. The "hump" tracks are used in an "up and up" fashion, heading up the hill climb, rather than in the normal "up and down" way. More on my progress later...


No comments:
Post a Comment